Quick Start
This guide walks through the shortest useful Karvio workflow: create a project, add test cases, execute a run, record evidence, and review the result.
Use it for a local evaluation, an onboarding demo, or the first project setup after installation.
Workflow at a Glance
flowchart LR
  A["Project"] --> B["Suites"]
  B --> C["Test cases"]
  C --> D["Test run"]
  D --> E["Results"]
  E --> F["Dashboard and history"]
1. Create a Project
Projects are the top-level containers for all testing work. Data, users, permissions, runs, attachments, and audit logs are scoped to a project.
- Open Projects from the sidebar.
- Click New Project.
- Enter a Name and optional Description.
- Click Create.
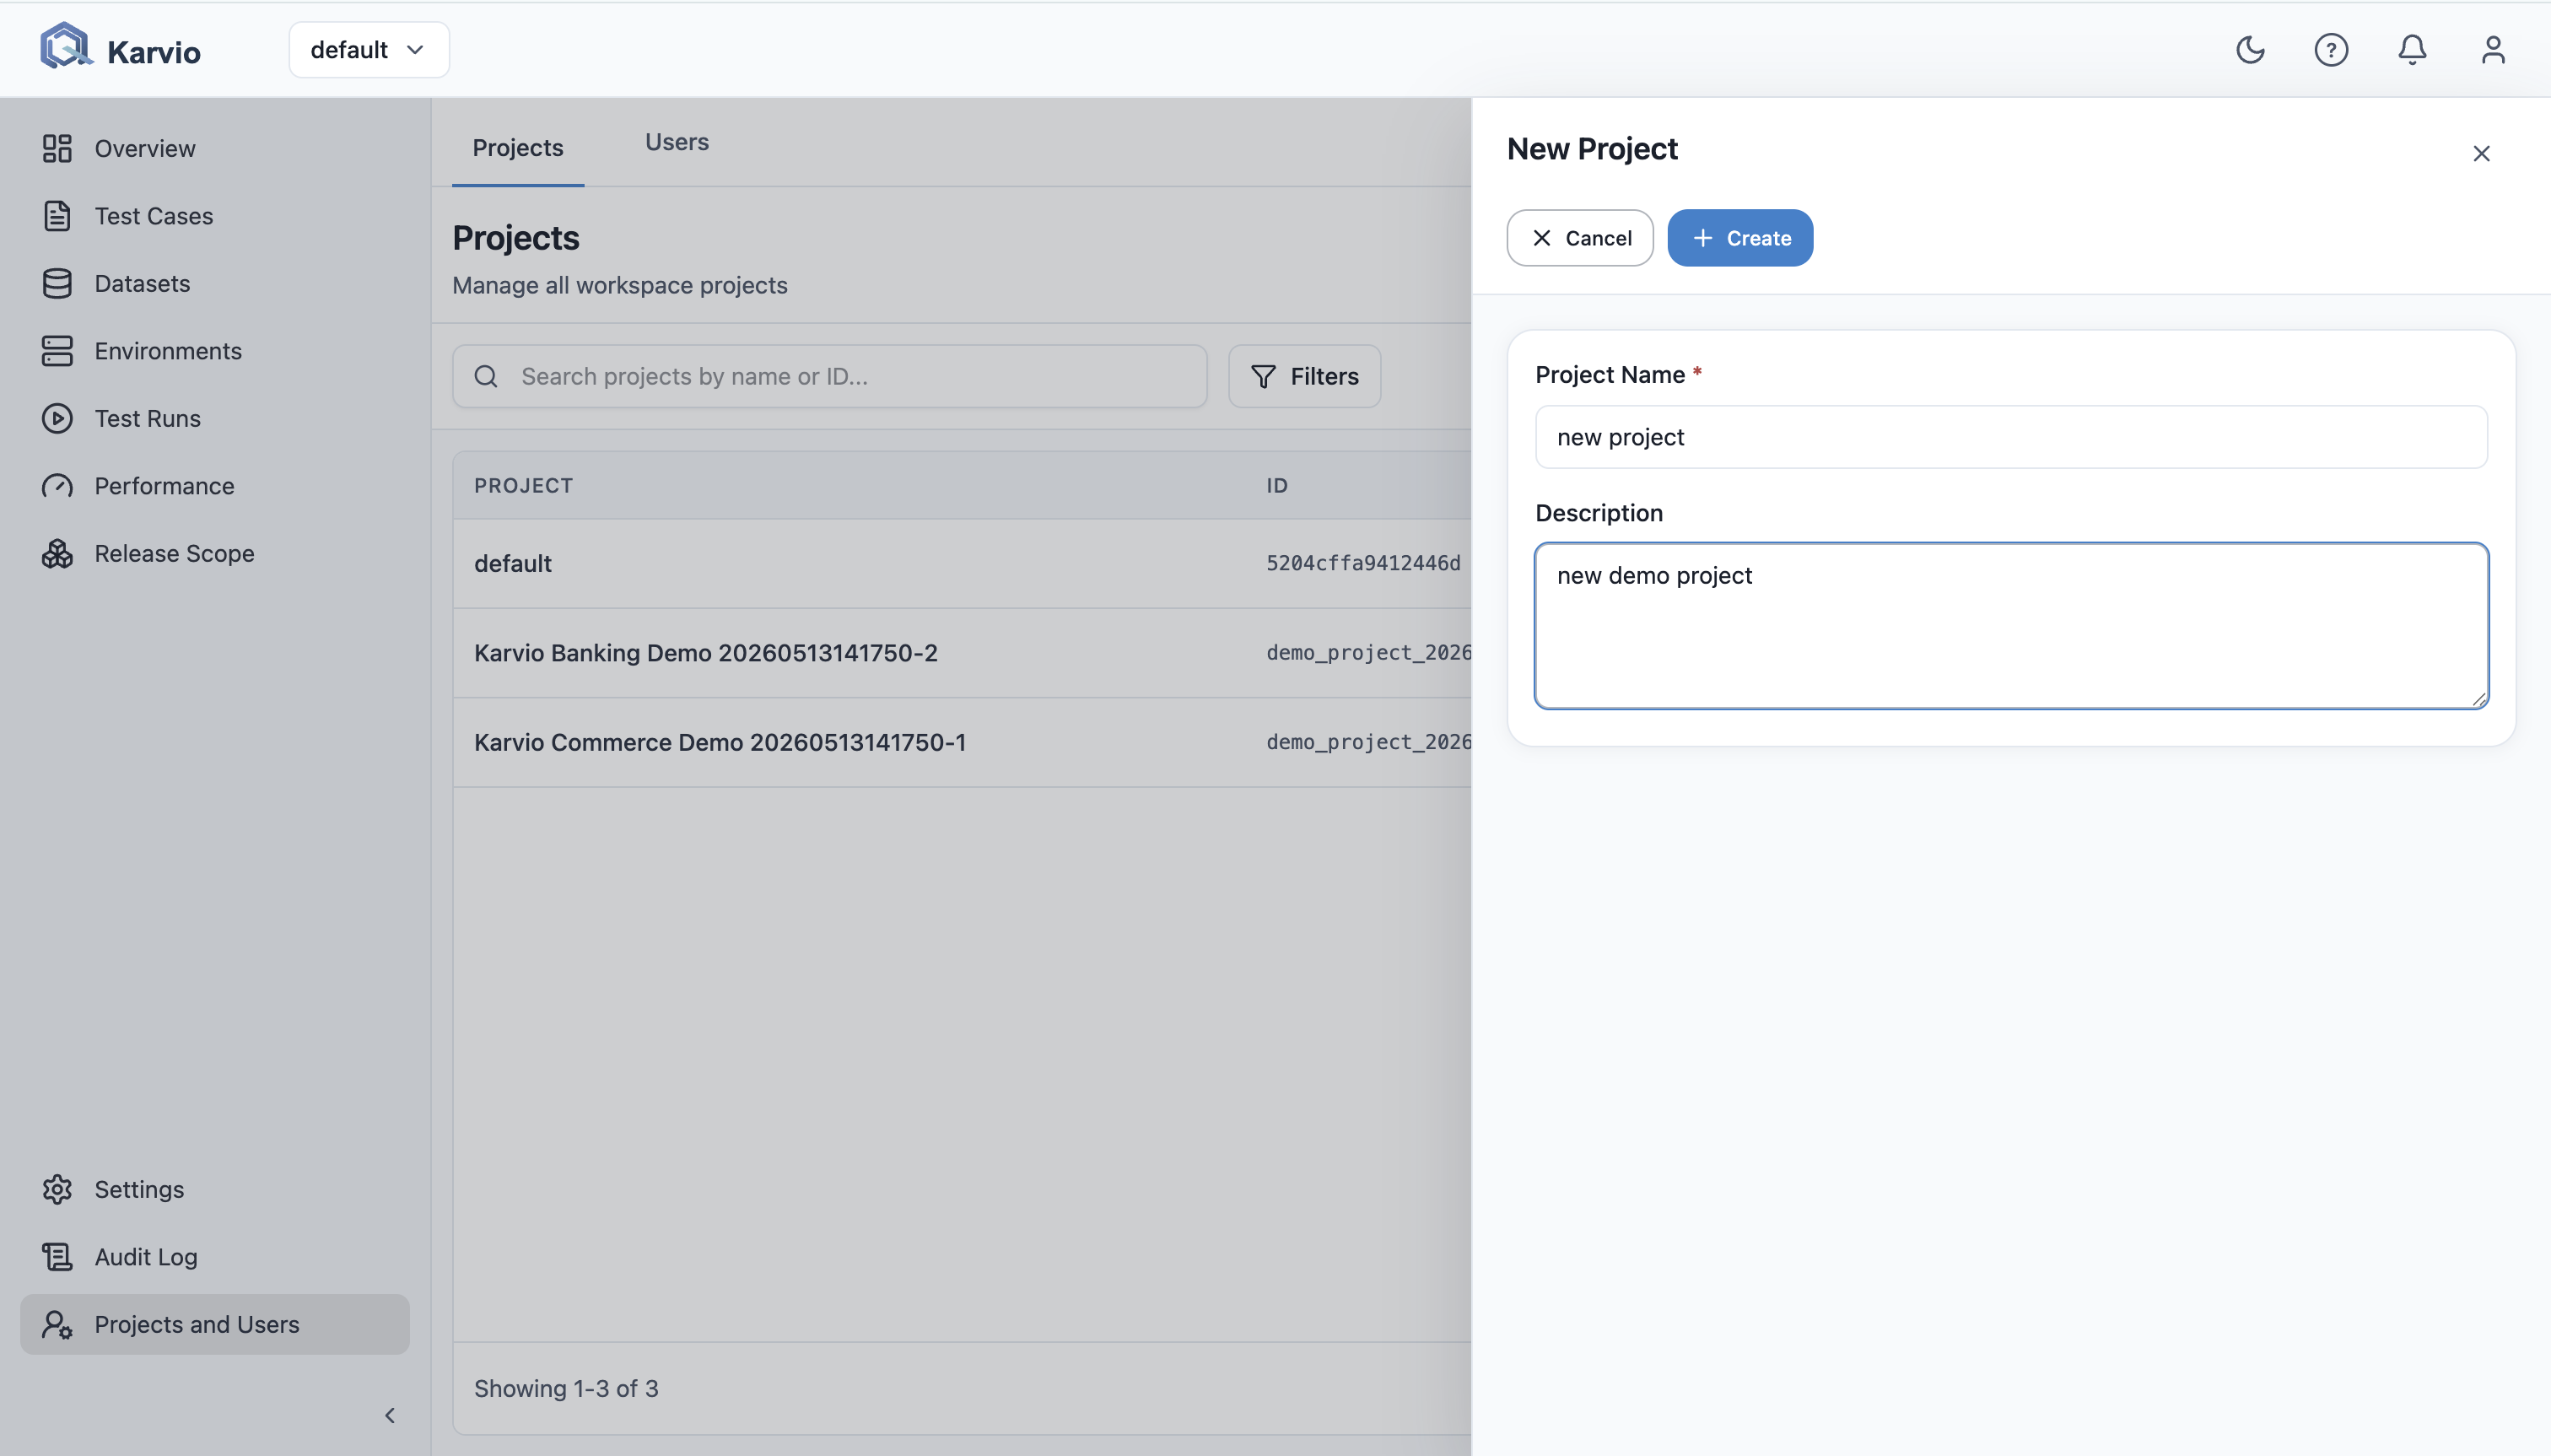
You are redirected to the project workspace. All subsequent work in this guide happens inside that project.
2. Add a Suite
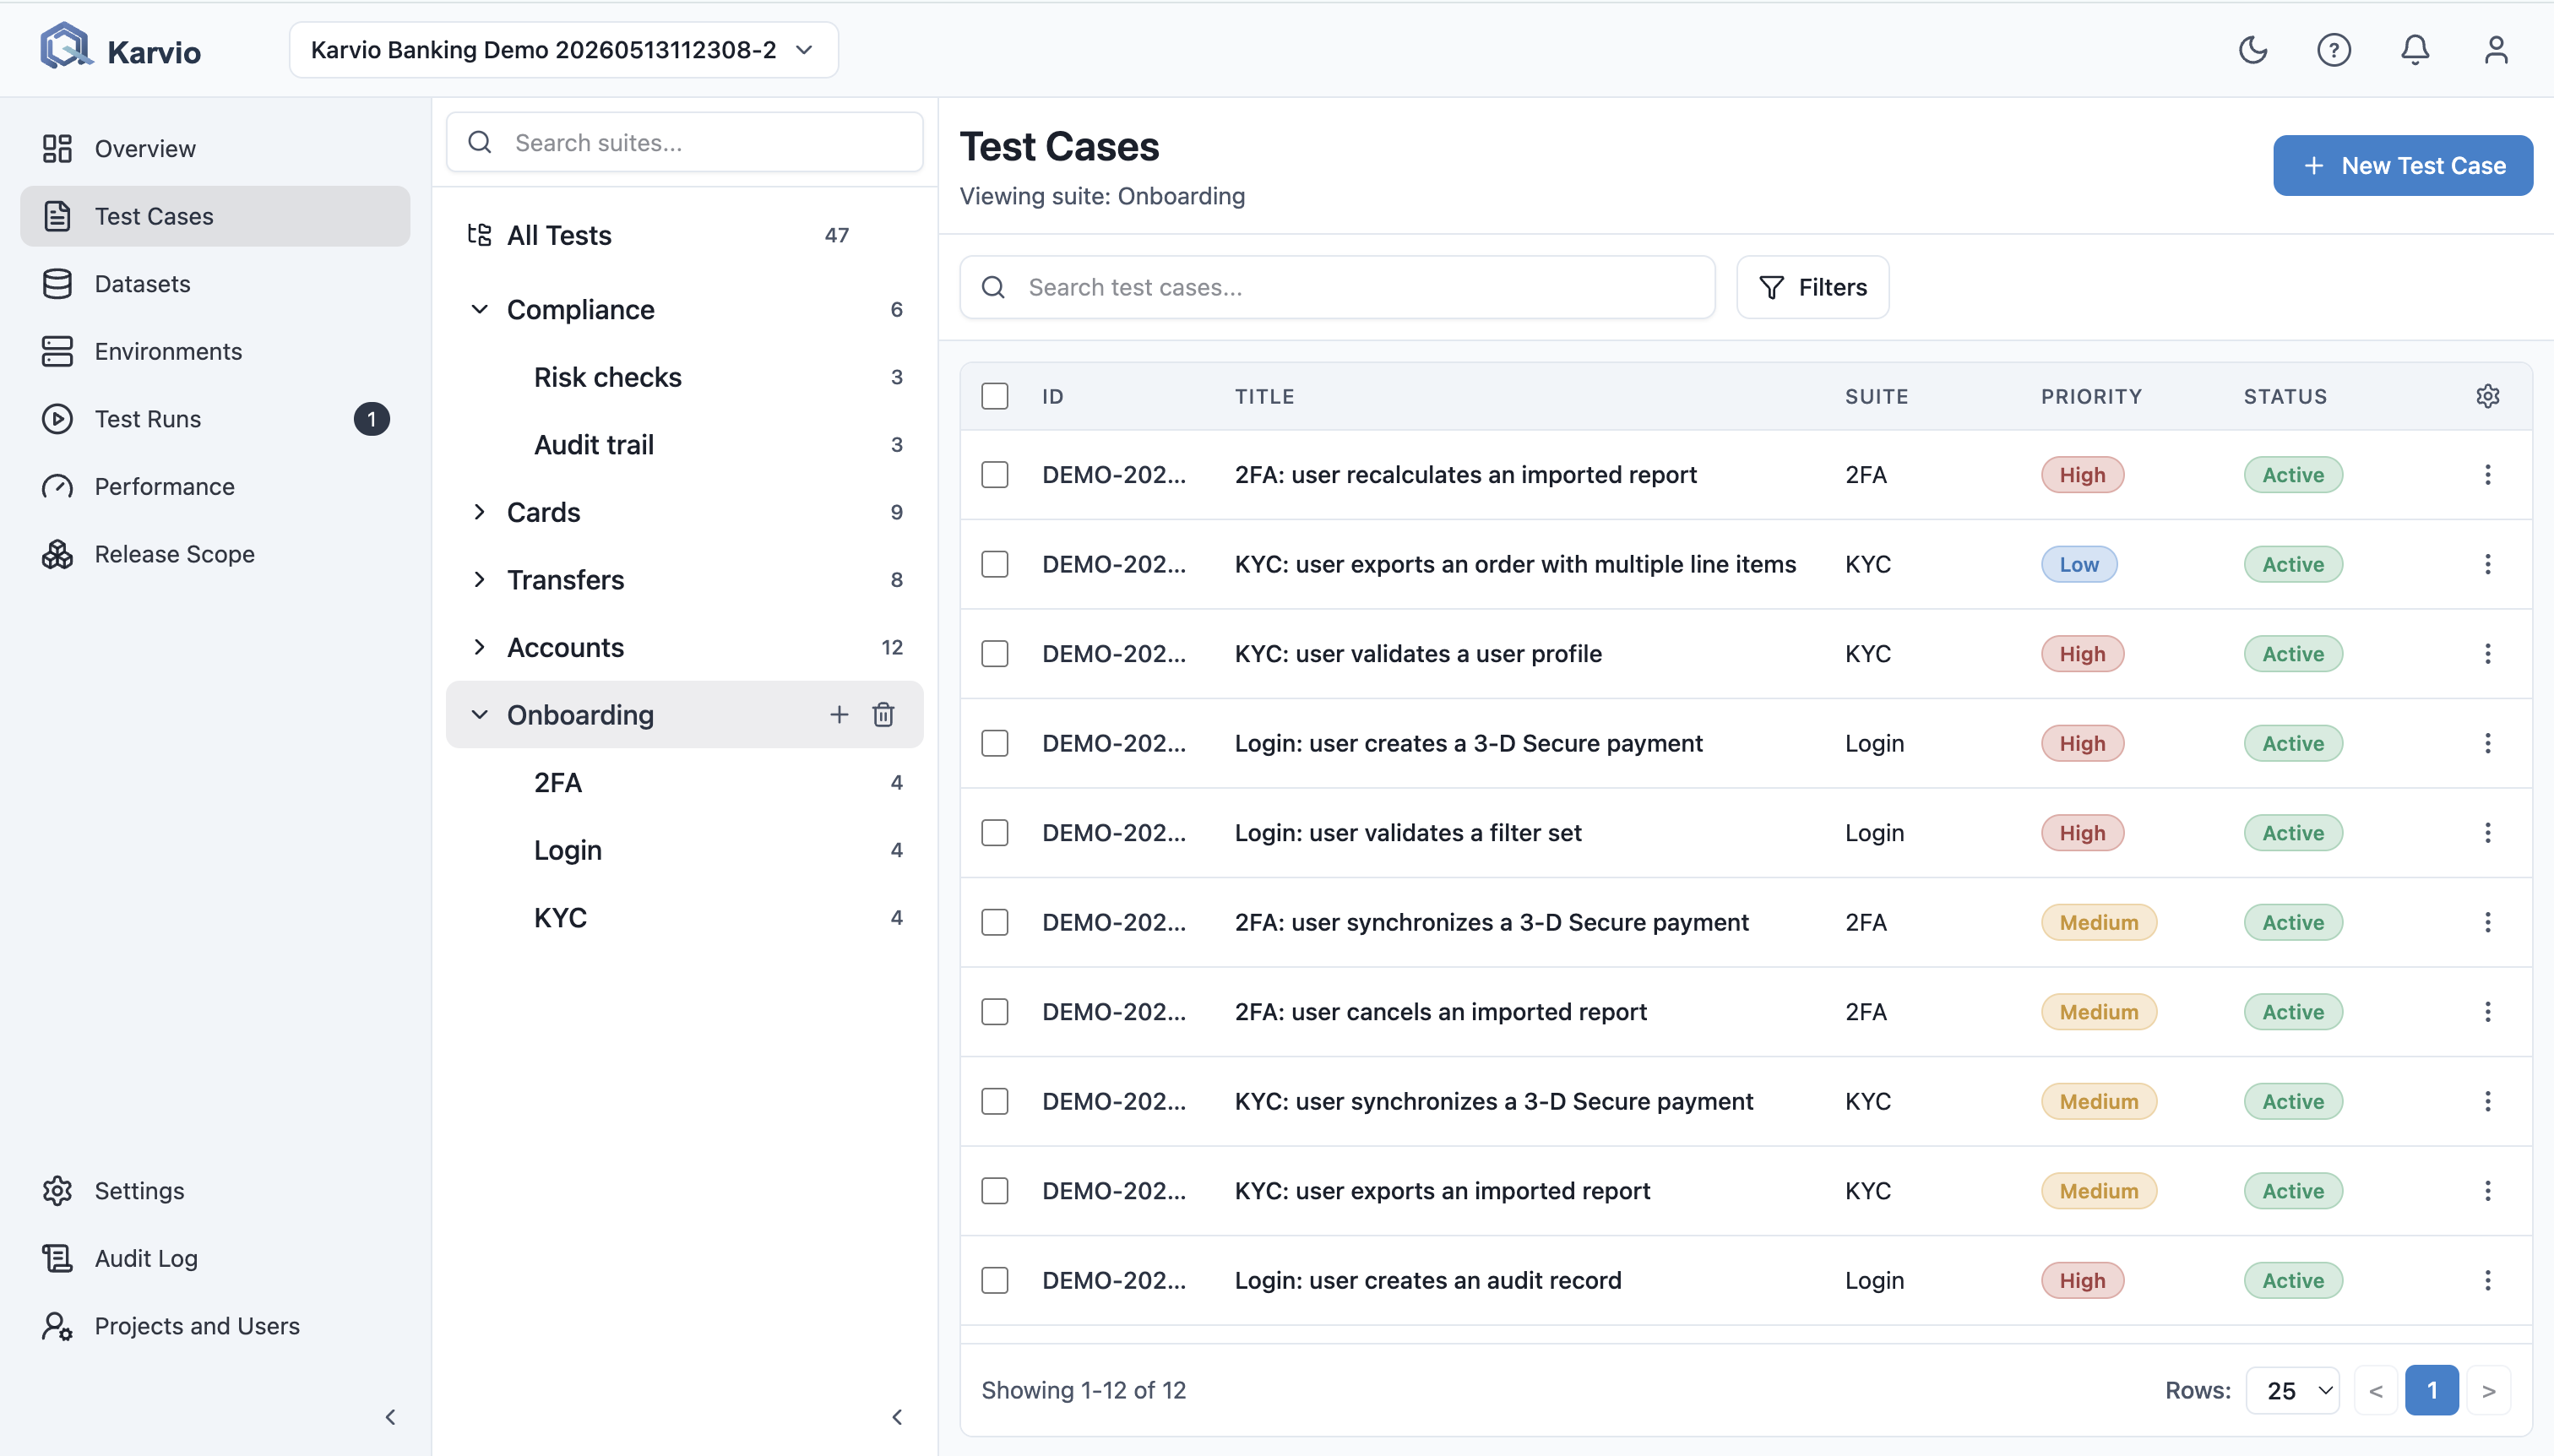
Suites organize the case repository. Start with broad product areas, then add nested suites only when a section becomes hard to scan.
- Go to Test Cases.
- In the suite tree, click New Suite.
- Name the suite after a stable feature area, for example
Authentication. - Save the suite.
3. Create Test Cases
Create a small set of cases before importing or writing the full repository. This keeps the first run easy to review.
- Select the target suite.
- Click New Test Case.
- Fill in the core fields:
| Field | Example | Guidance |
|---|---|---|
| Name | User logs in with valid credentials |
Use a short behavior statement. |
| Priority | High | Set by business or release risk. |
| Owner | QA engineer or feature owner | Use for review and maintenance responsibility. |
| Tags | smoke, auth, web |
Add stable filters, not one-off notes. |
| Description | Login with an active account should open the dashboard. | Include prerequisites and scope. |
| Steps | Action + expected result rows | Keep each step observable and verifiable. |
- Click Save.
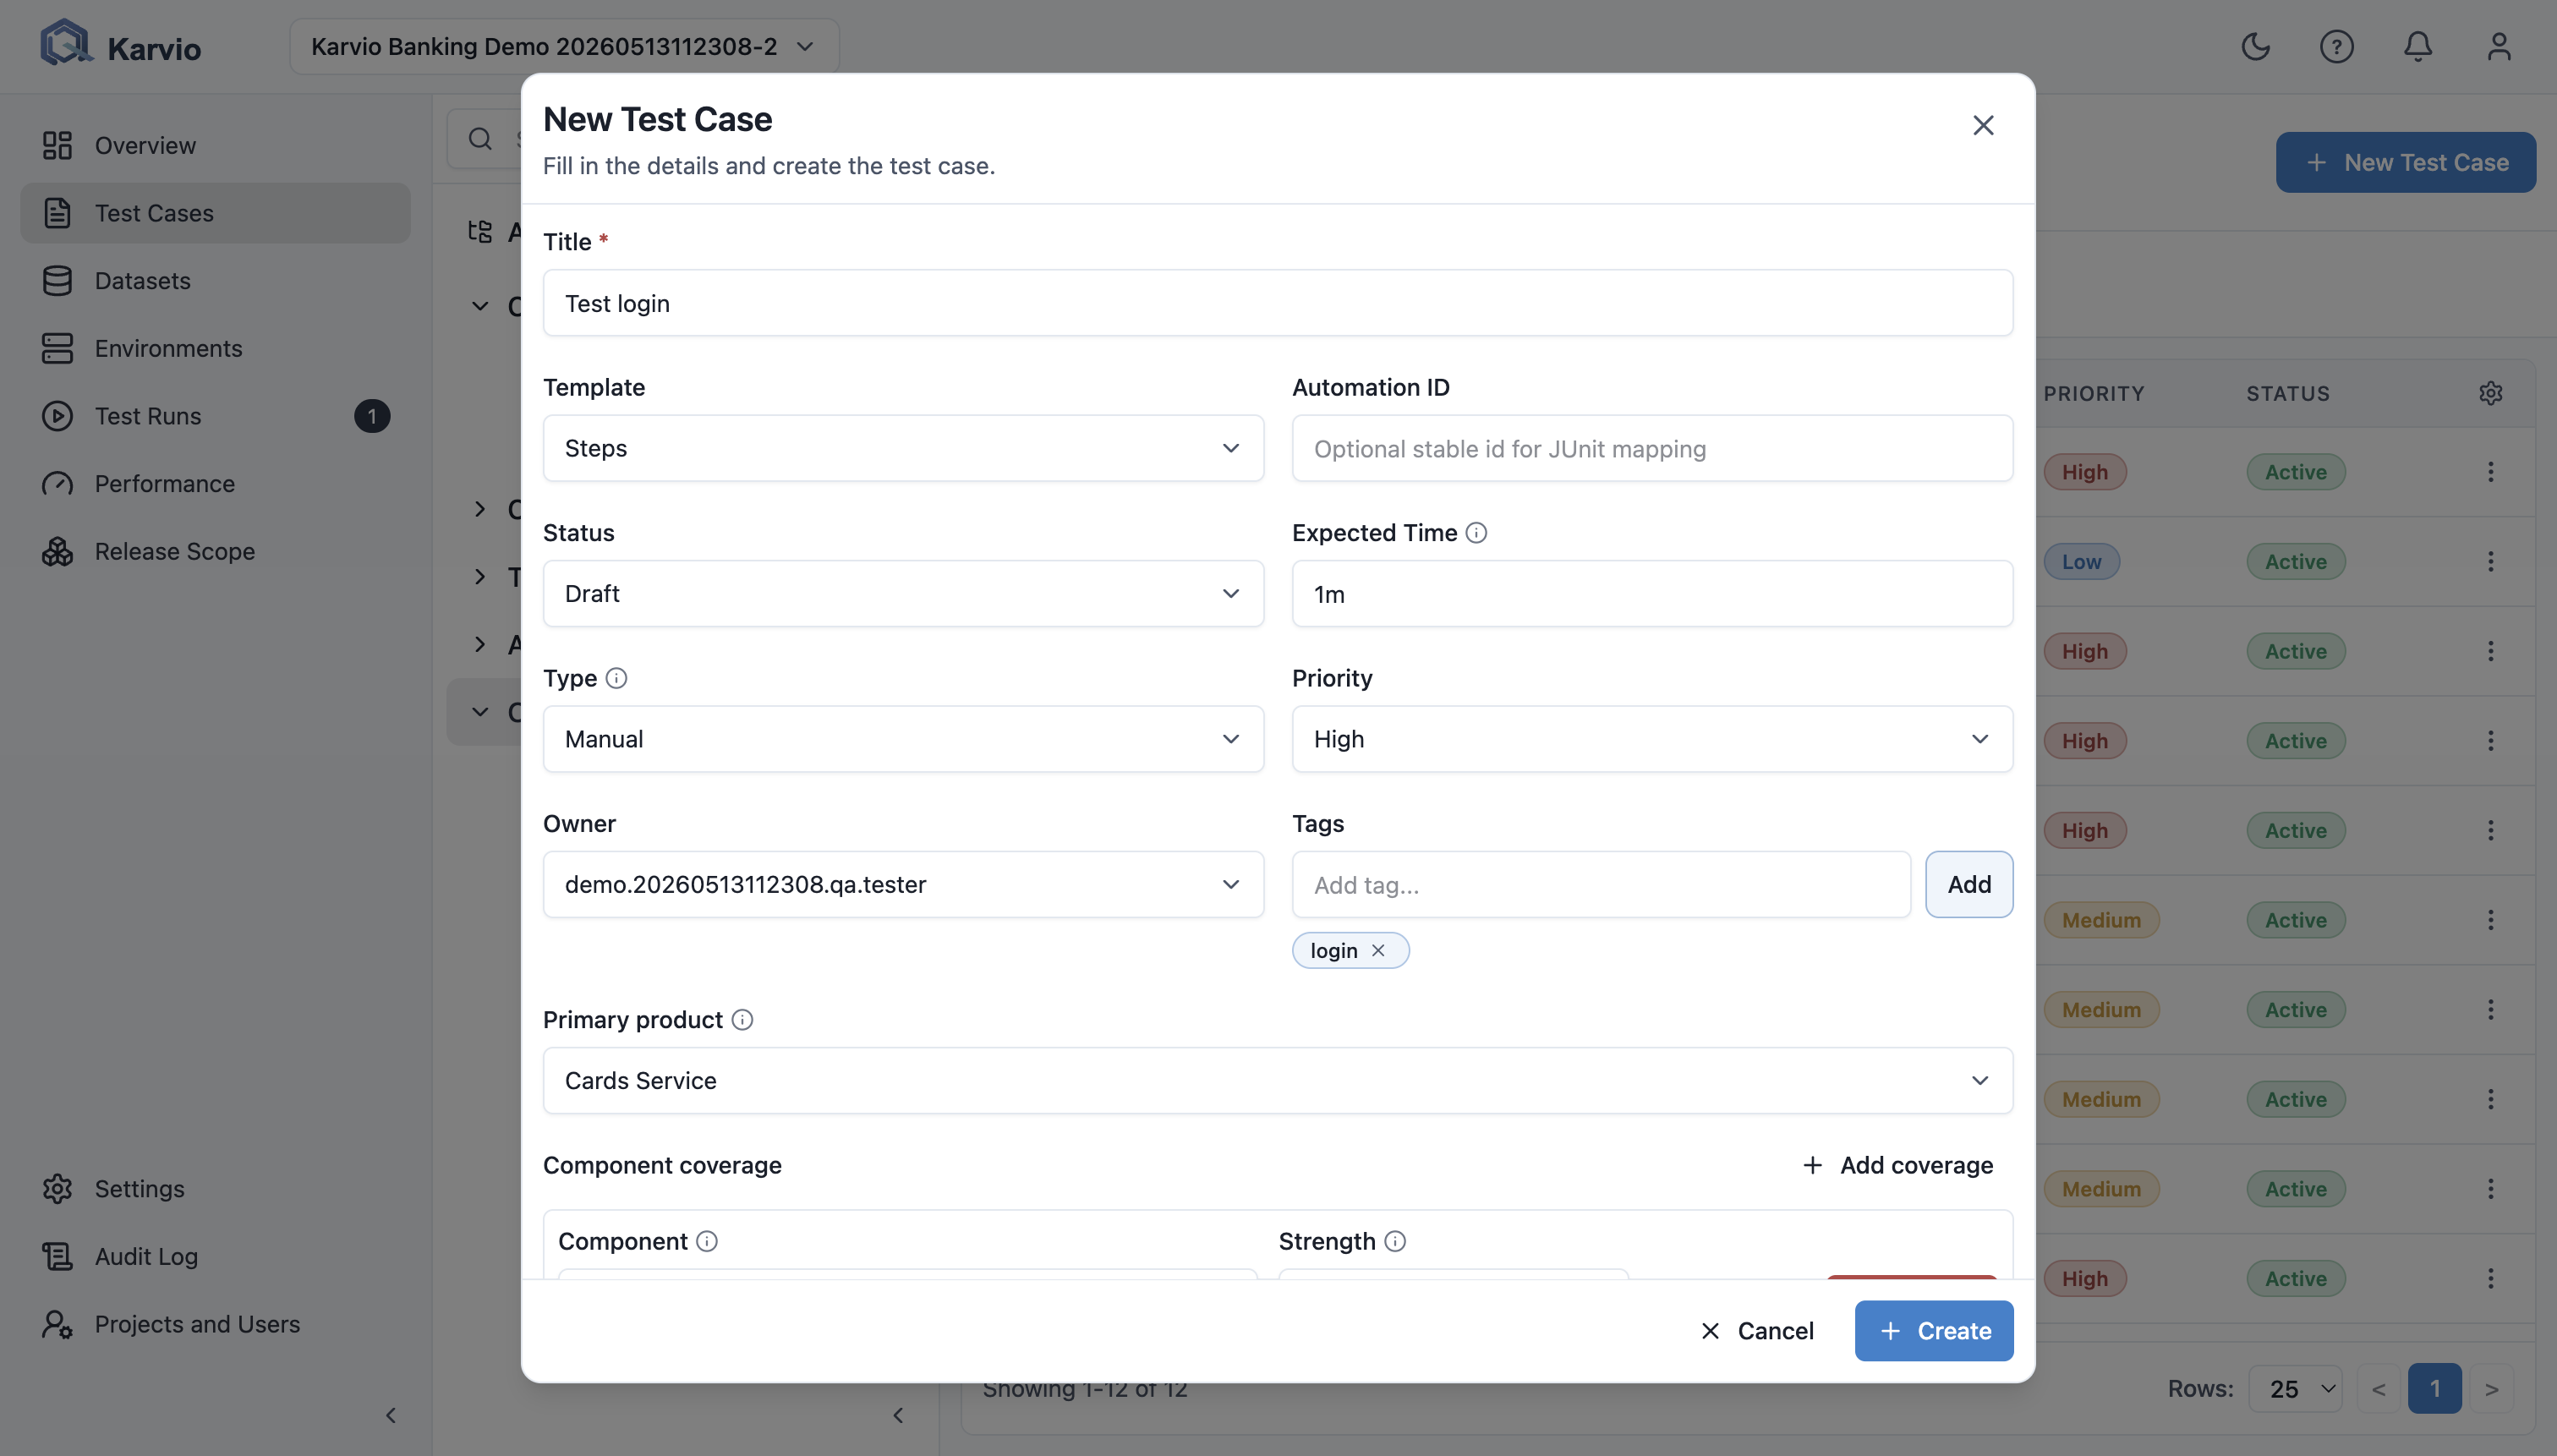
Repeat until you have at least three cases: one expected pass, one likely failure, and one edge case. This makes the run summary meaningful.
4. Create a Test Run
A test run is one execution of selected cases against a specific build and environment.
- Go to Test Runs.
- Click New Test Run.
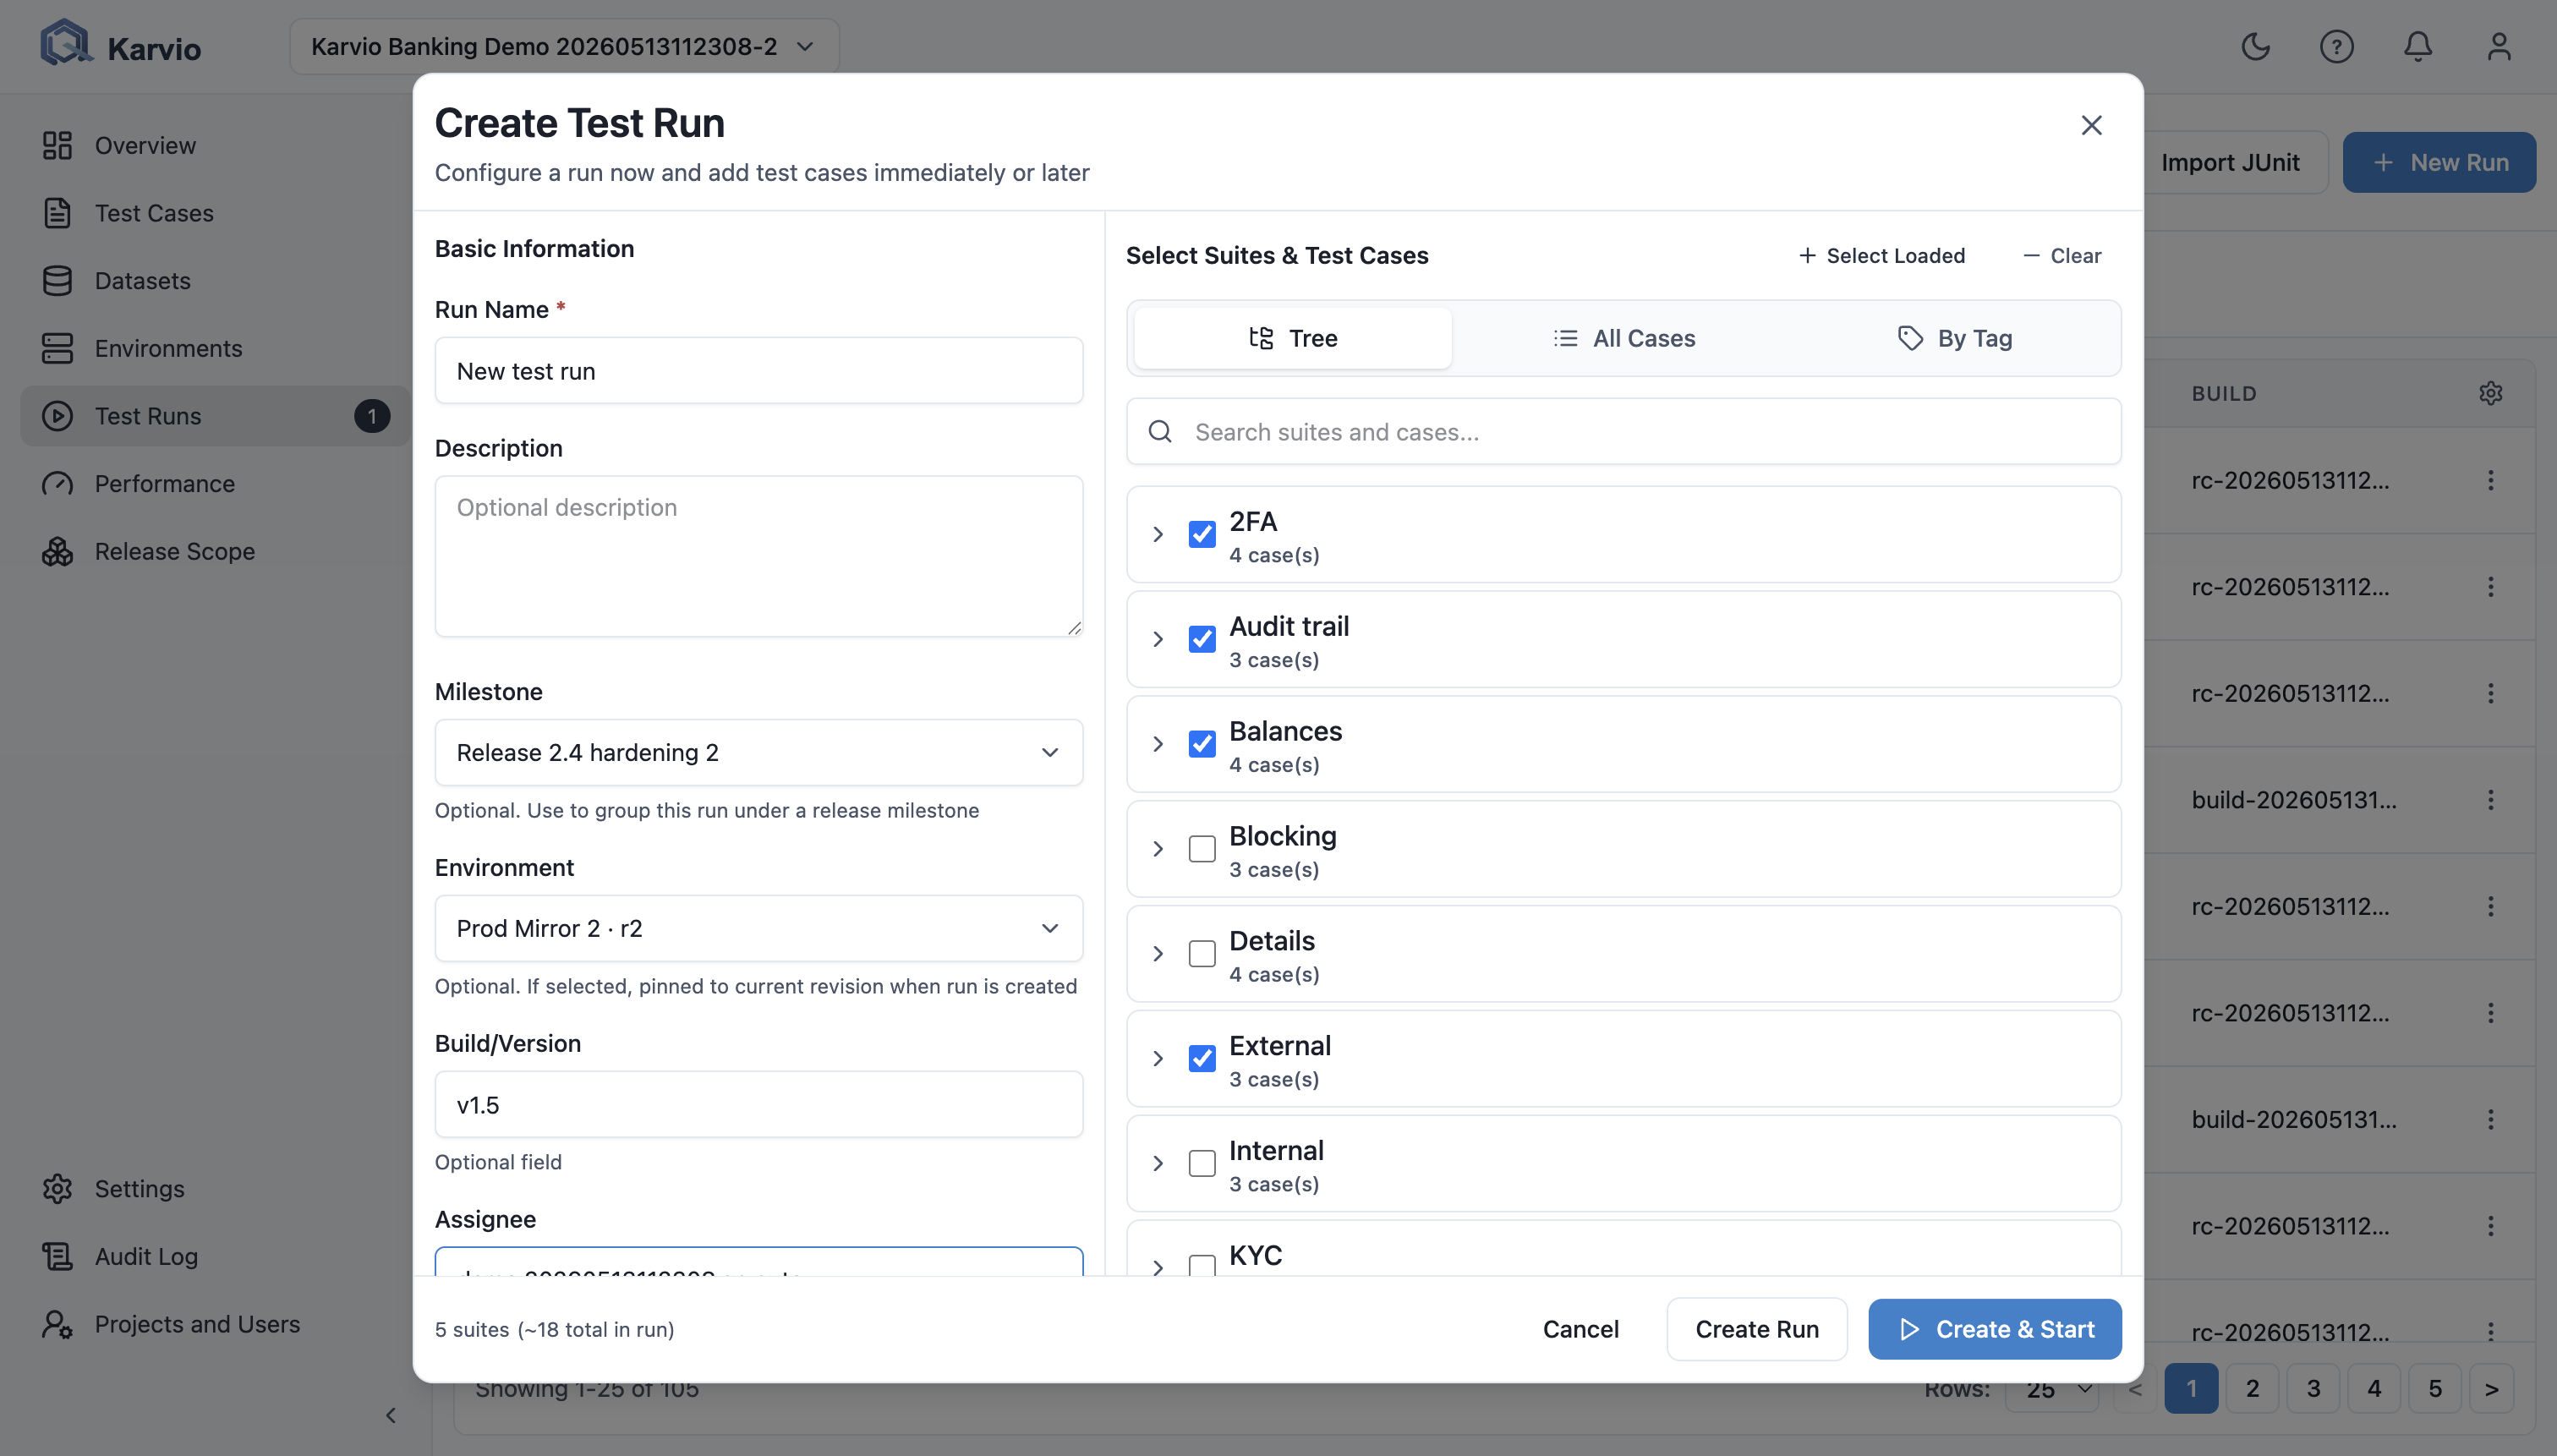
- Fill in the run details:
| Field | Example |
|---|---|
| Name | Sprint 12 Smoke |
| Environment | Staging EU – Chrome |
| Milestone | Sprint 12 |
| Build | web-2026.05.09.1 |
| Description | Smoke coverage before release candidate approval. |
- Select the test cases to include.
- Click Create.
5. Execute the Run
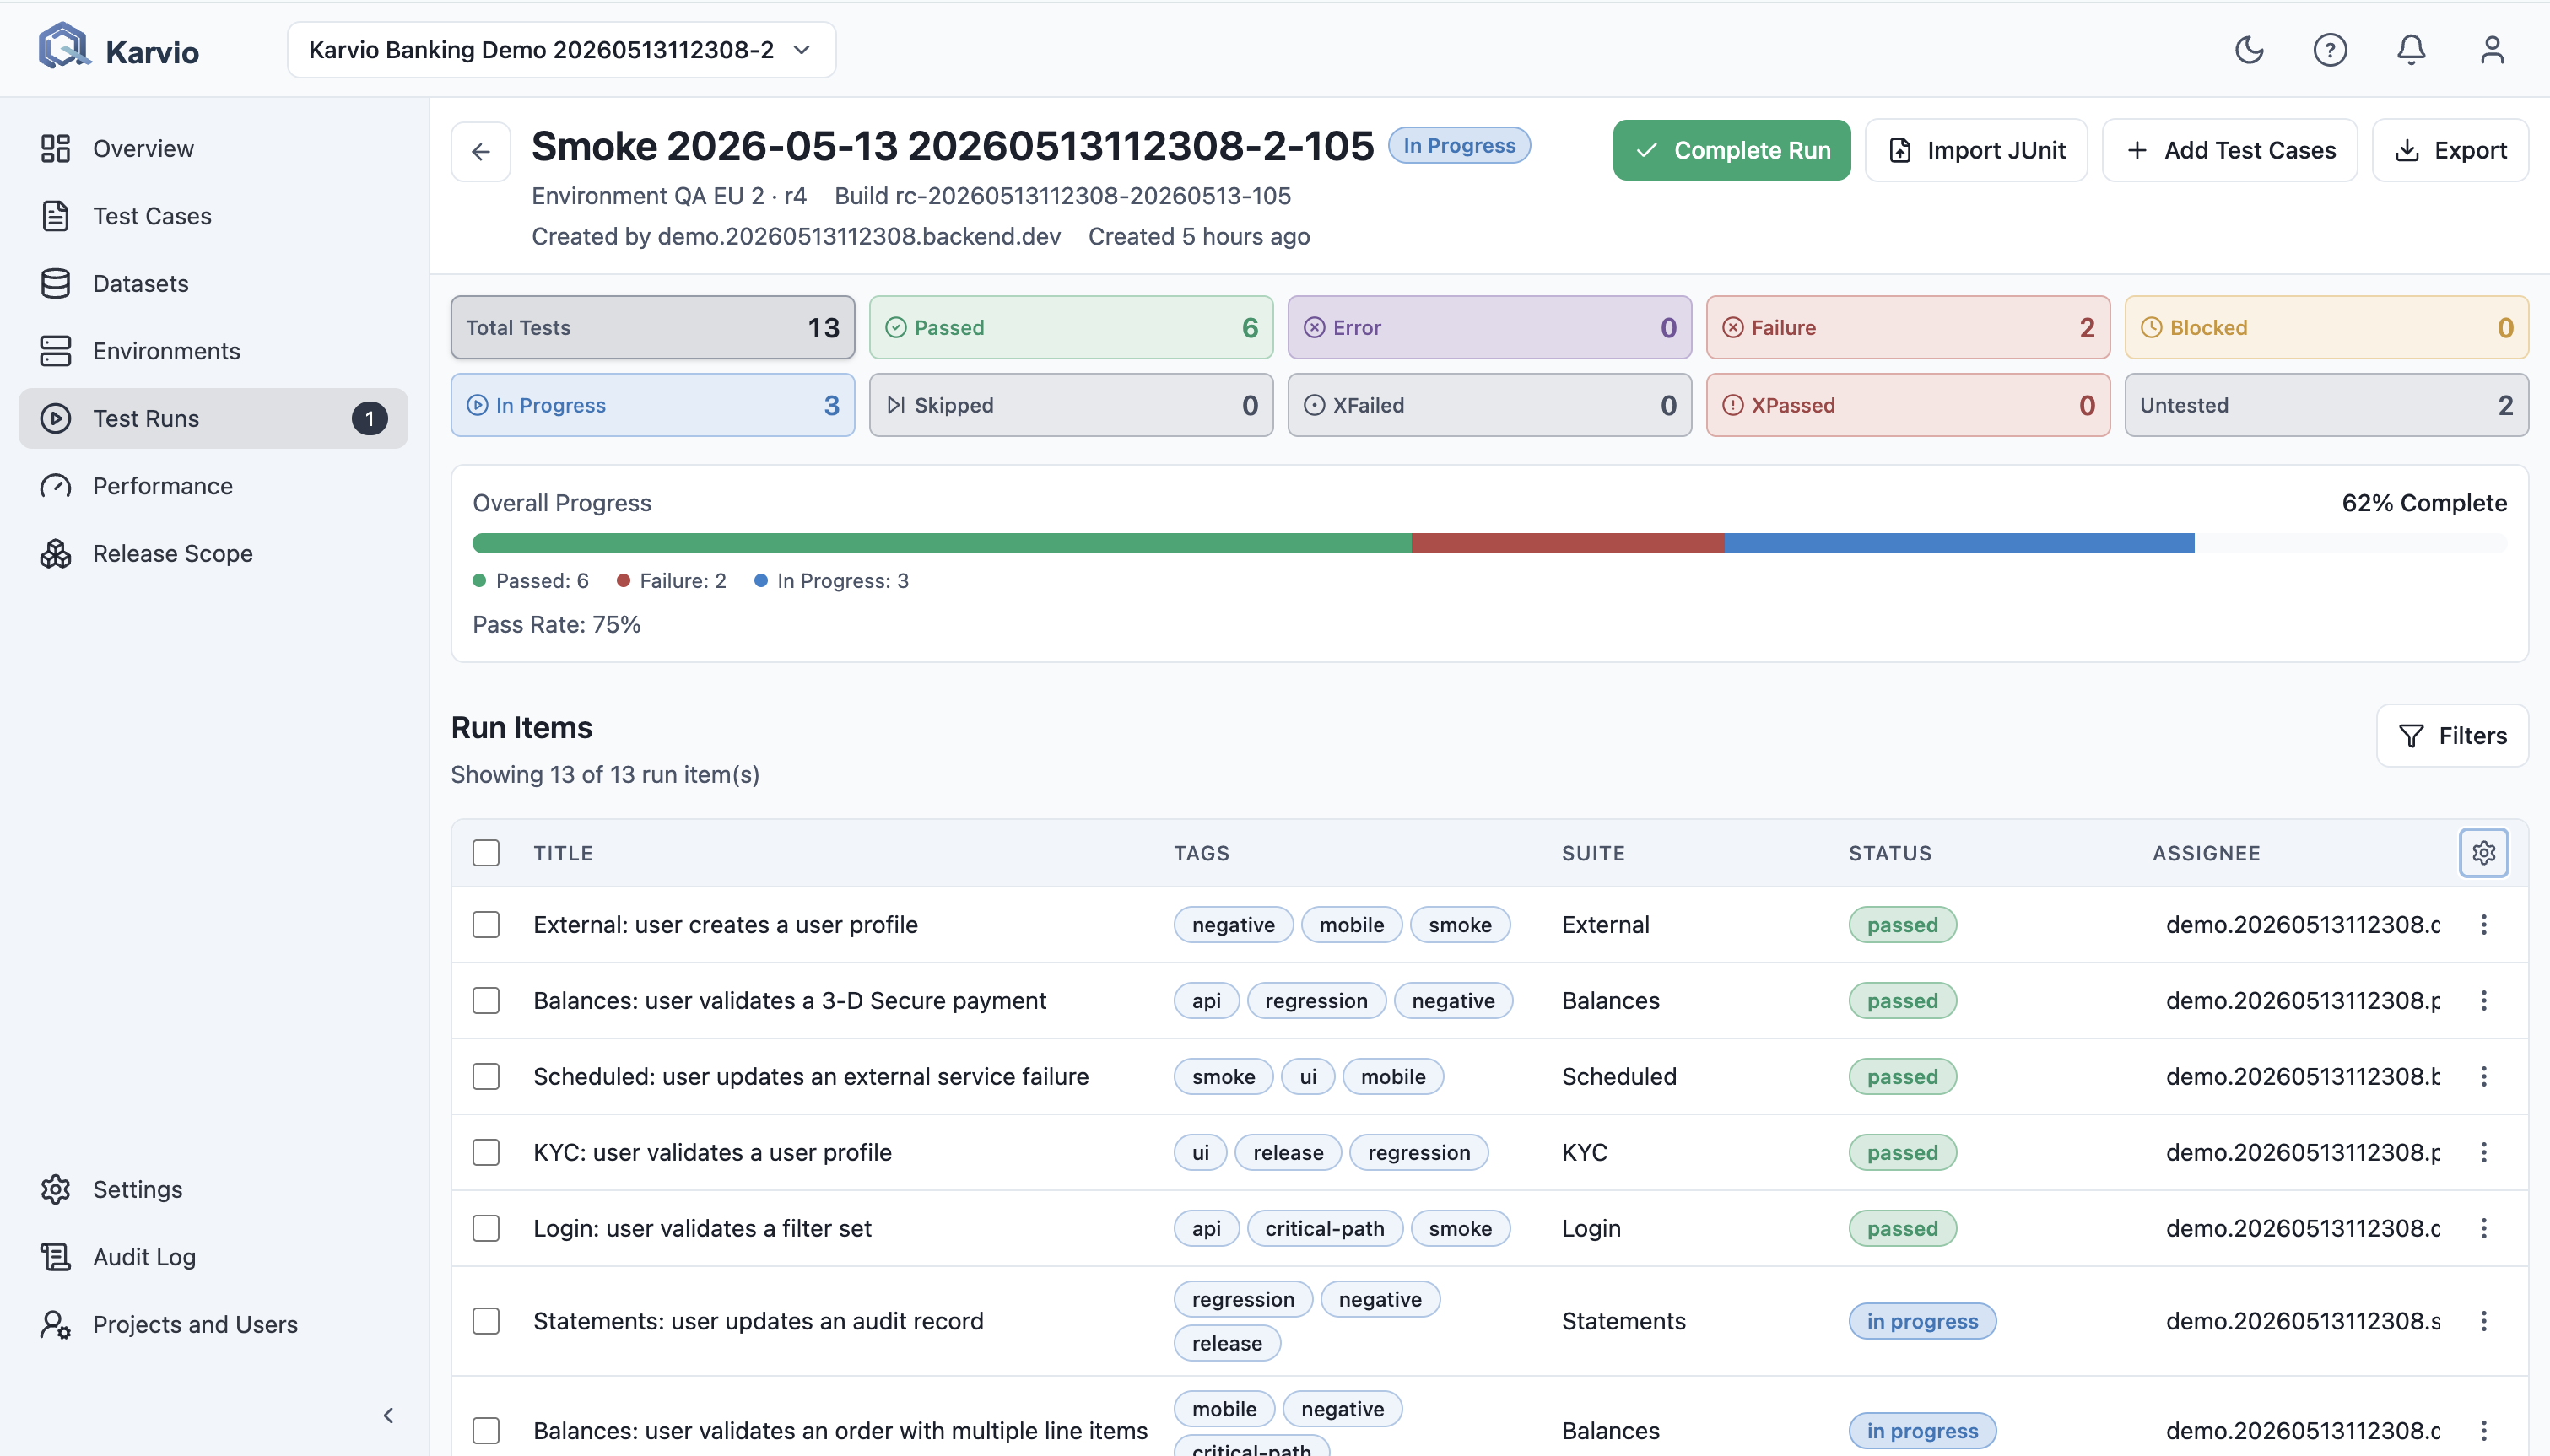
Open the run and work through each run item.
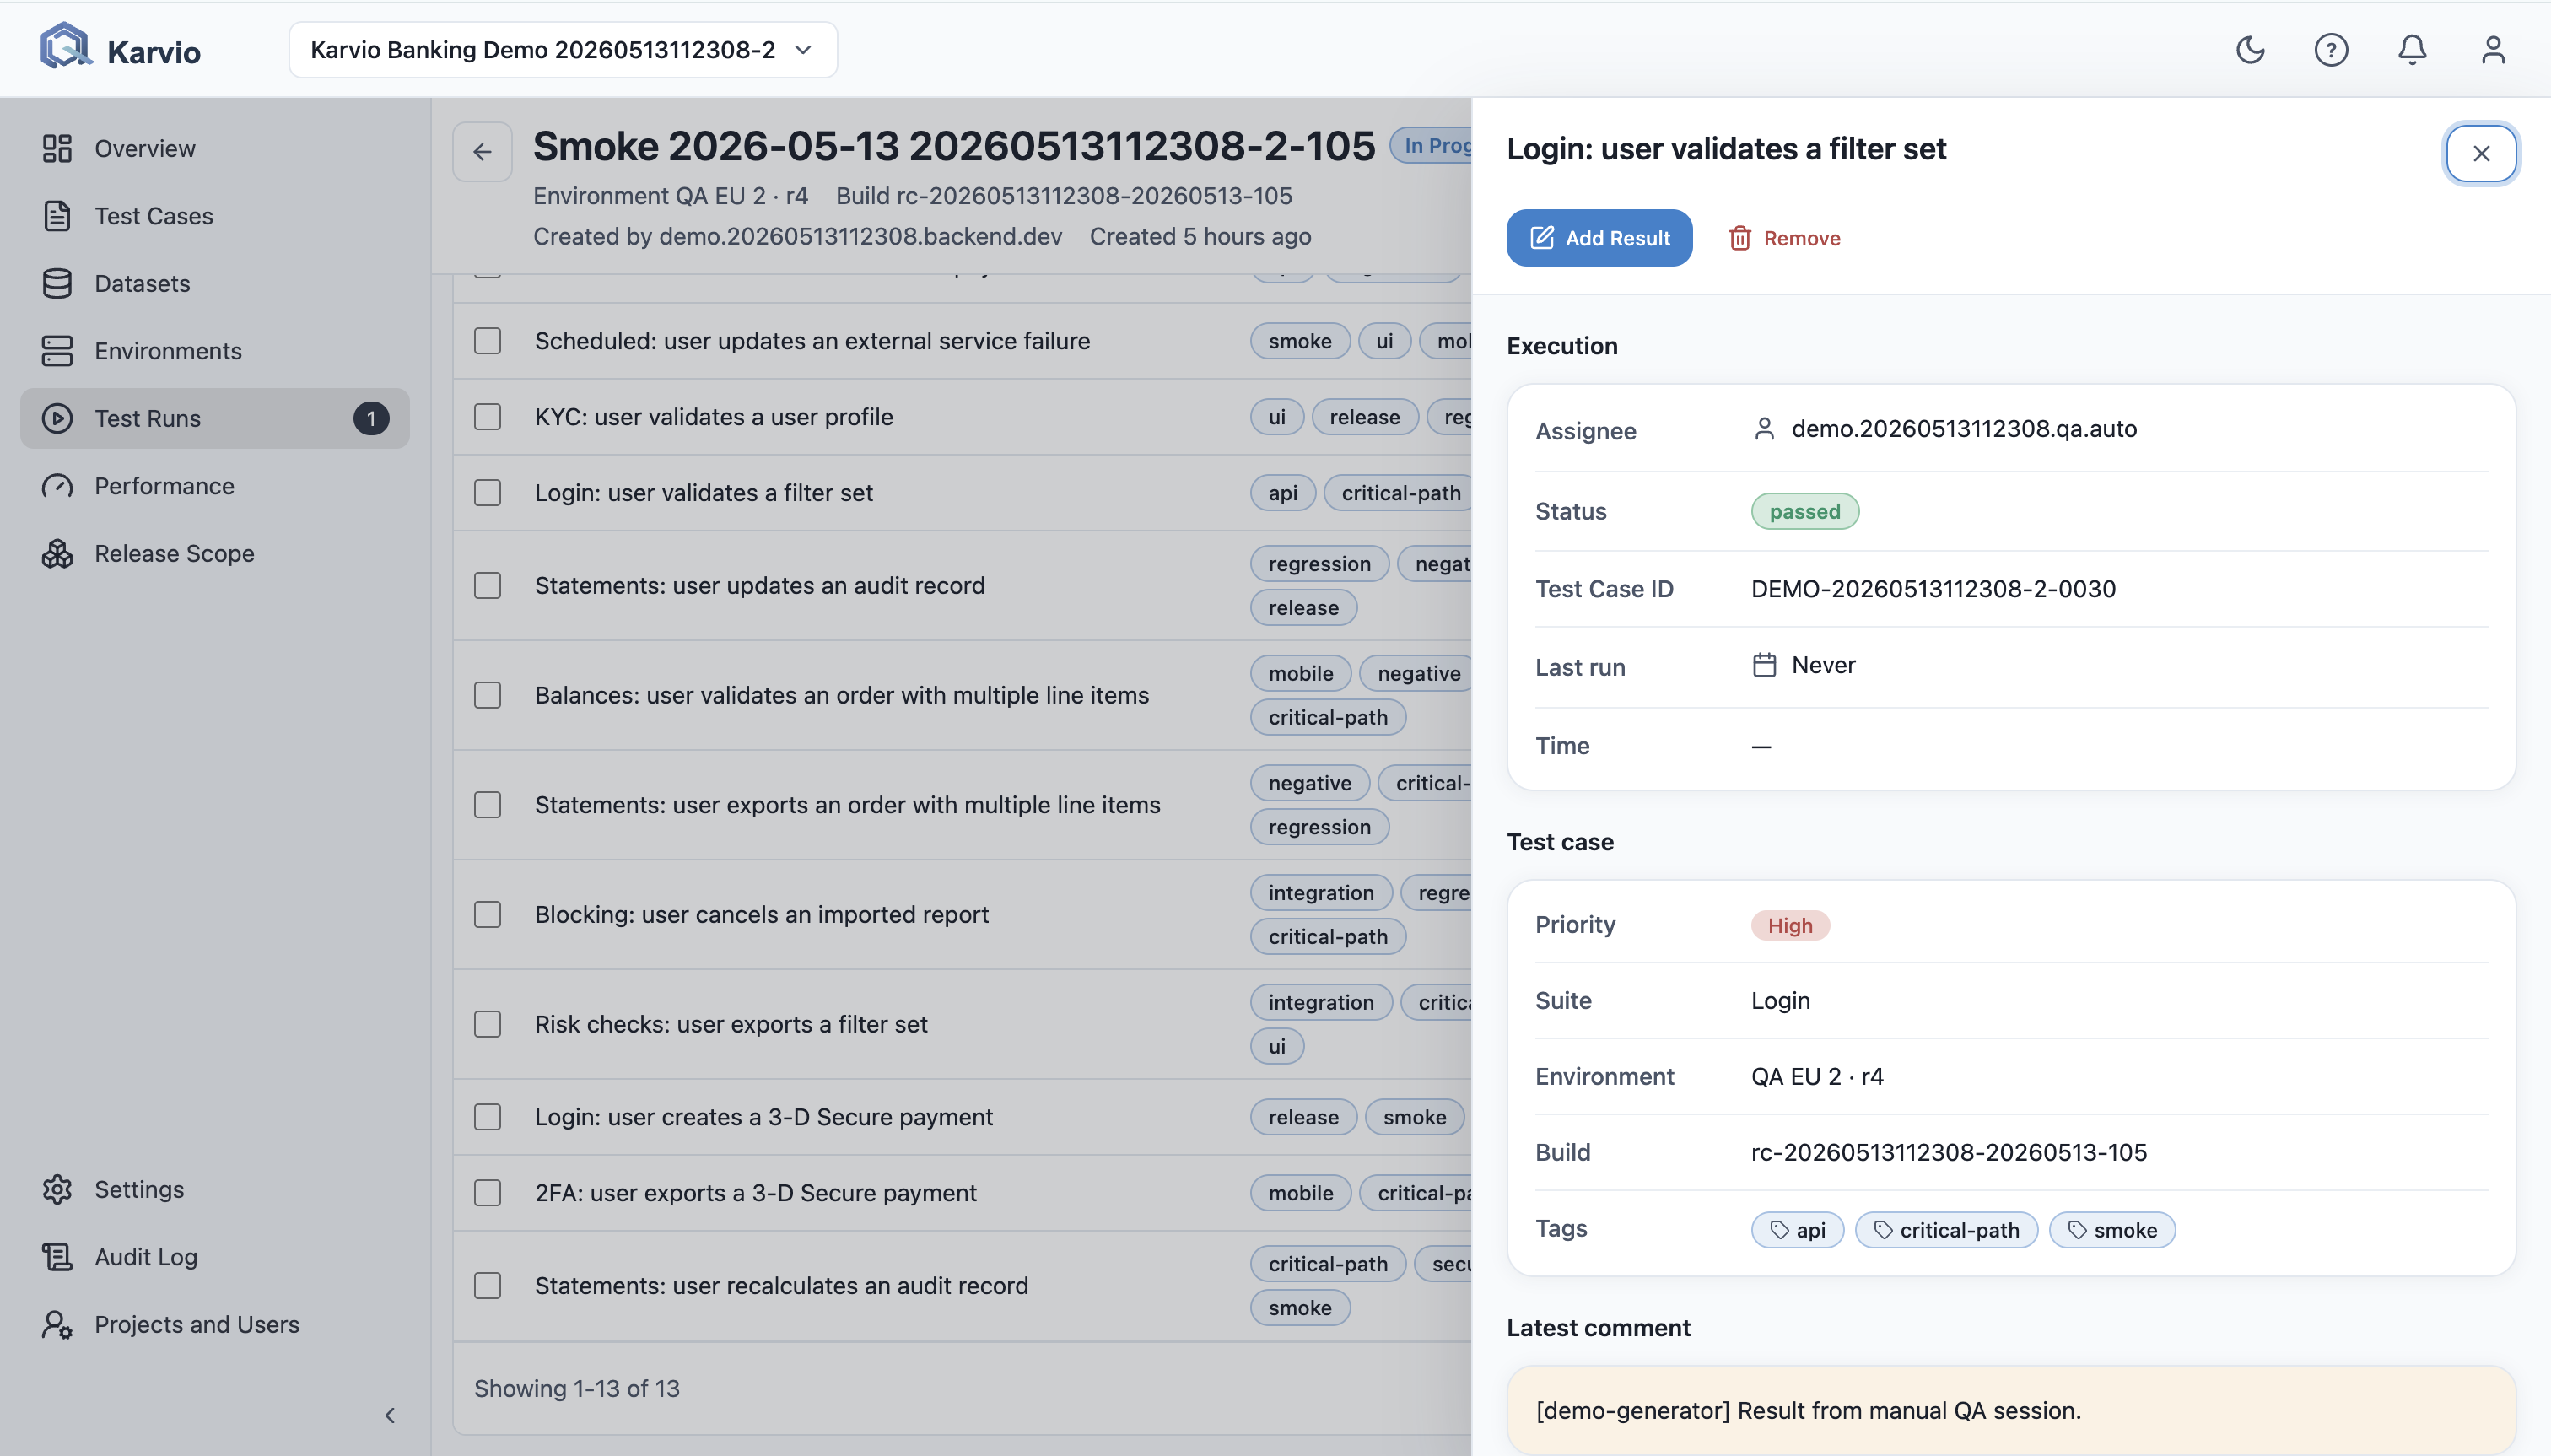
- Click a run item to open the detail panel.
- Review the case description, steps, and expected results.
- Set the result status:
- Passed when the observed behavior matches the expected result.
- Failed when the behavior is wrong and should be triaged.
- Blocked when execution cannot continue because of an external dependency.
- Not Applicable when the case does not apply to this build or environment.
- In Progress when execution has started but is not final.
- Add a comment for every failure, blocker, or non-obvious pass.
- Upload evidence such as screenshots, logs, or HAR files.
- Save the result and move to the next item.
6. Review Results
When execution is complete:
- Review the run progress bar and status distribution.
- Open failed items and confirm they have comments and evidence.
- Create or link Jira defects if the integration is configured.
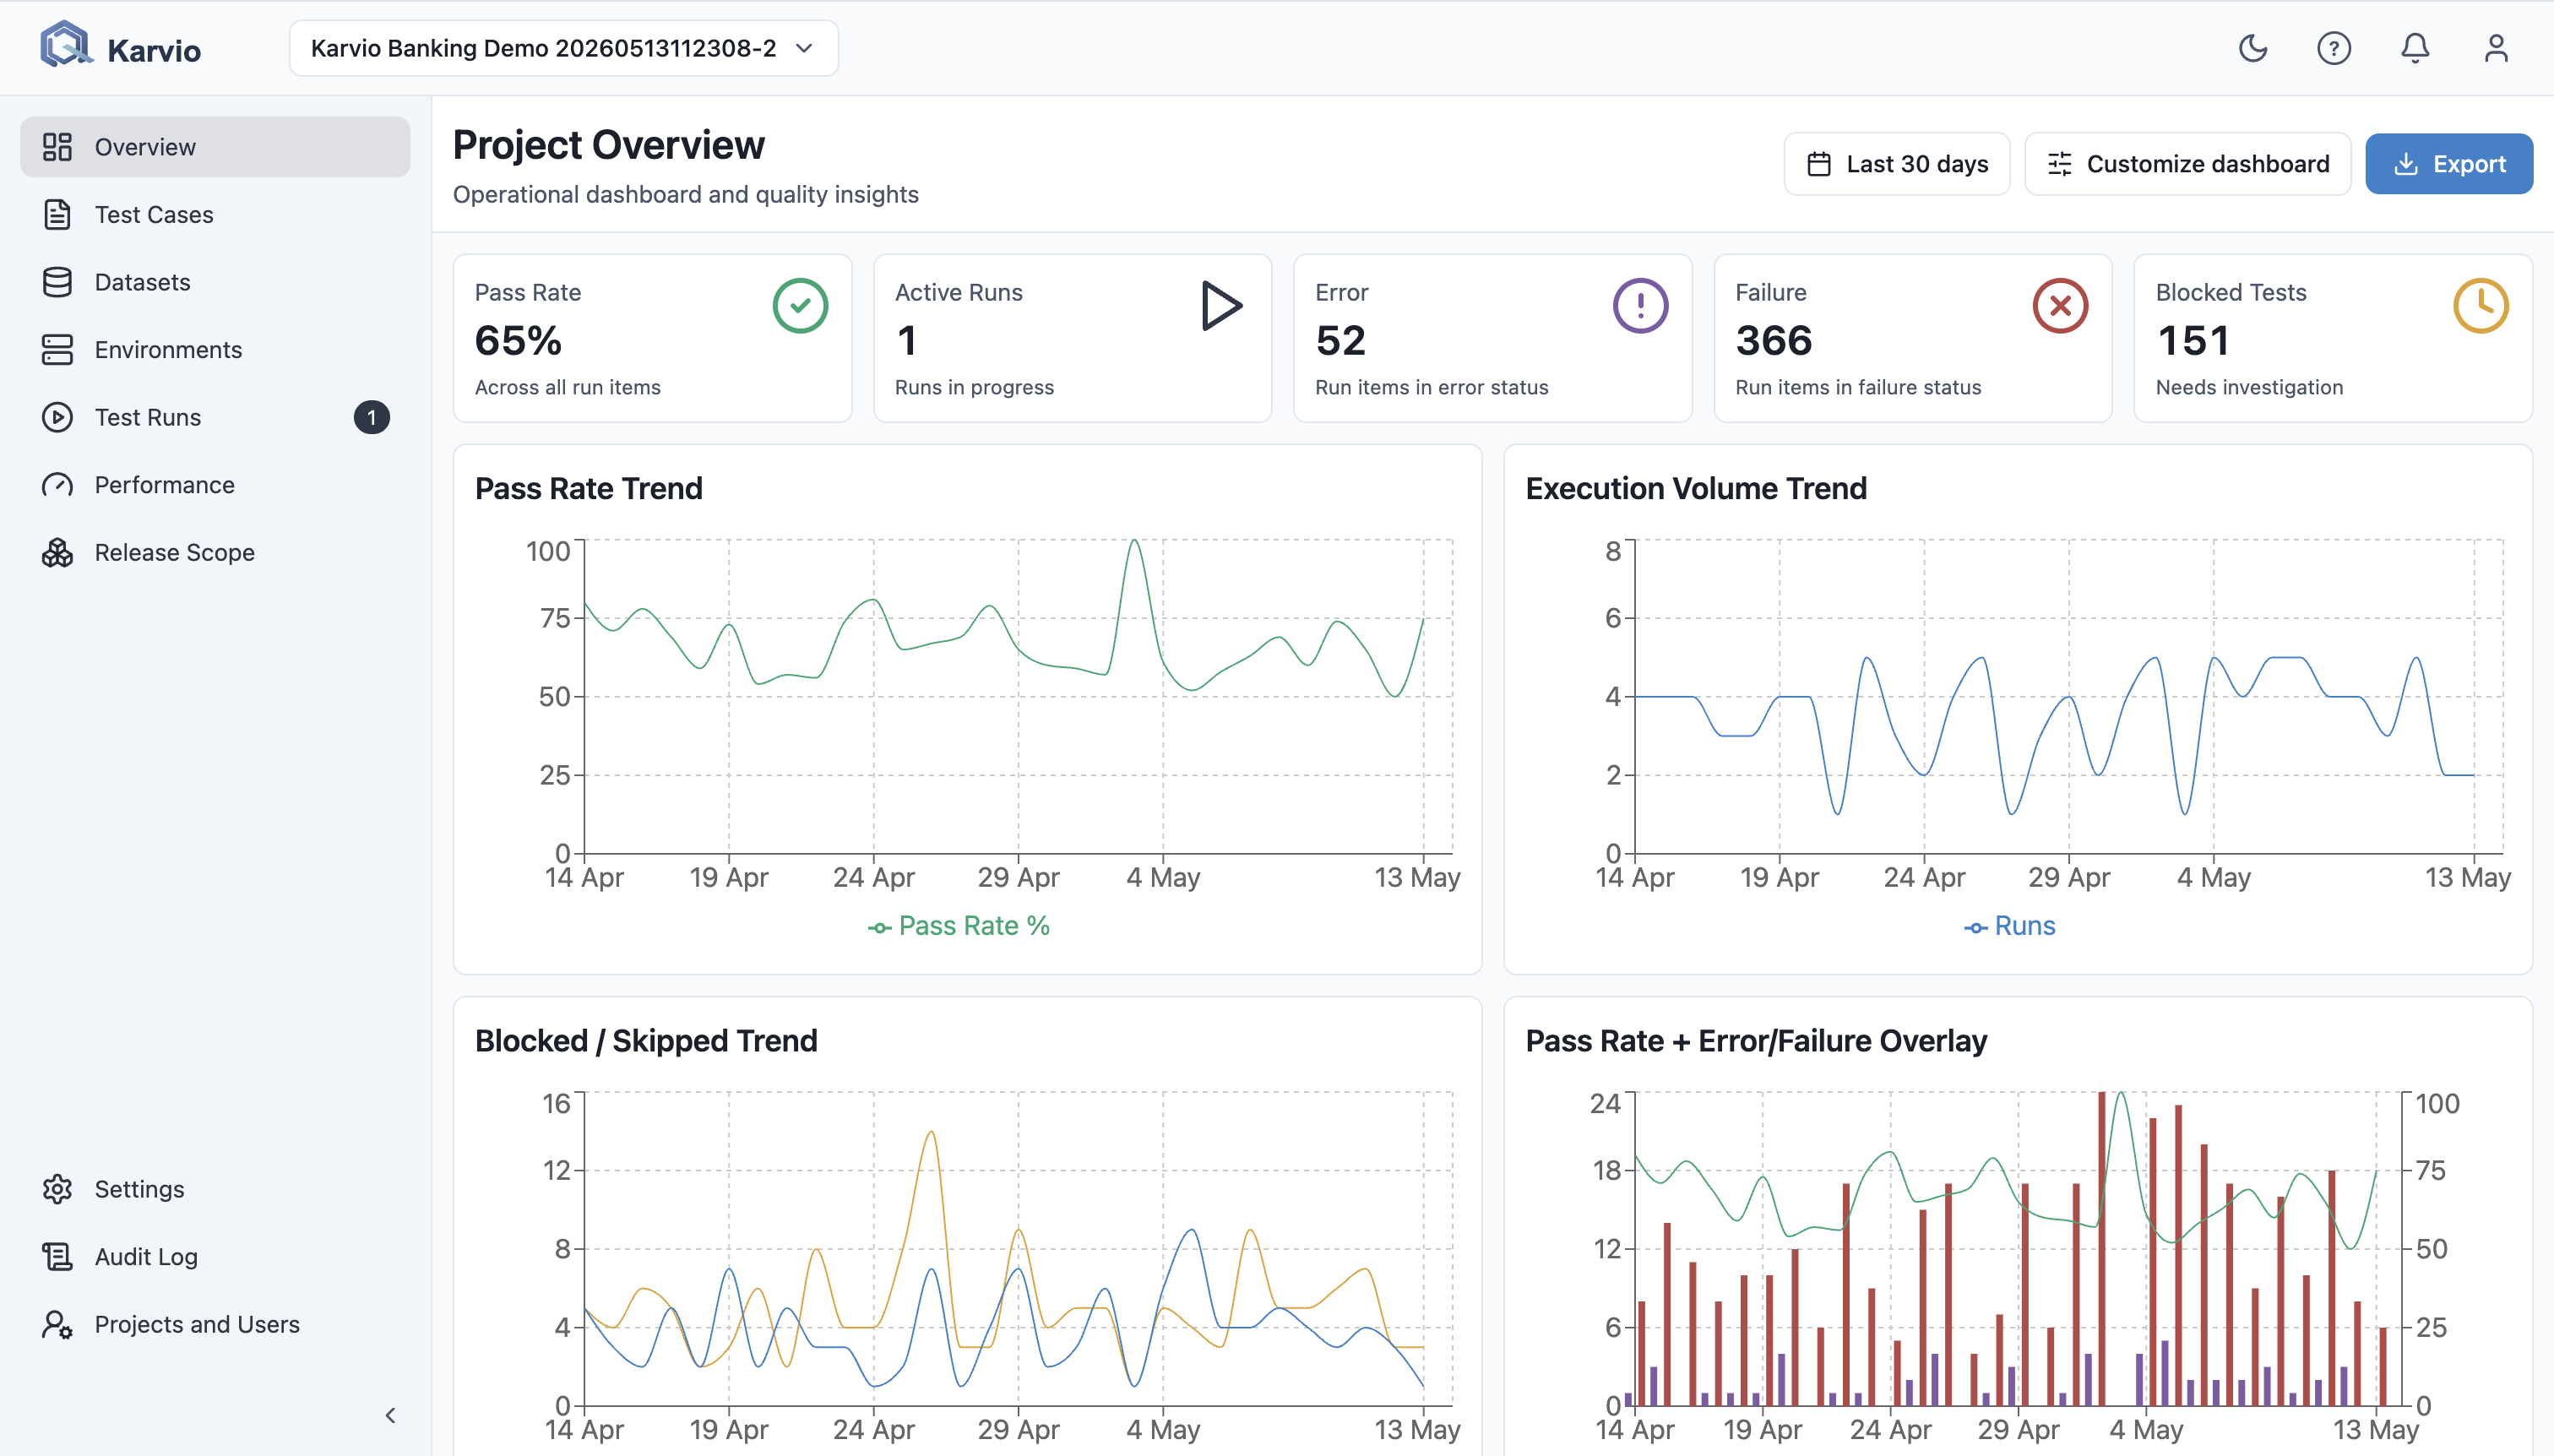
- Open Overview to review pass rate, recent activity, execution trend, and environment/build breakdowns.